

There is A LOT to digest on this page, I know. But please know
this, I’ve been rocking my natural curls—exclusively—since late 2015, and in
this bog post I share every single lesson I’ve learned.
You might ask what I’m getting out of this. Like, what’s in it
for me, sharing all this info? Why am I
doing this?
I’ll tell you why.
Because I believe in helping, uplifting, and empowering others.
Because when I first decided to embrace my curls back in the
fall of 2015, I felt helpless and frustrated and all I really wanted was for
someone with knowledge and experience to show me the way.
Because after I’ve spent the majority of my life HATING my
curls, I now have a daughter, Kennedy, who LOVES her curls more than anything,
and the more women I help, the more my daughter—and other little curly
girls—will see women who look like them…which will reinforce the need for all
of us to love and accept our curls even more!
So, that’s why.
I first published this post back in 2017, and a bevy of
wonderful blessings have happened since…
The renowned Chicken Soup
for the Soul book series—to which I’ve been a contributor since
2009—recently published the story of my and Kennedy’s “HAIRstory” in Chicken Soup for the Soul: The Best Advice
I’ve Ever Heard, which is available in bookstores and on Amazon now.
I’ve been approached with countless questions about my and
Kennedy’s hair in the most random places—the check-out at Walmart, the
drive-thru and McDonald’s, and while standing in line waiting for my kids to
see Santa.
I am so very grateful for each and every inquiry—and I am even
happier for the opportunity to assist others on their curl journey.
So let’s talk curls...
The
Beginning
I spent the first 38 years of my life basically pining for
stick-straight hair, and I’ve had long hair (anywhere between shoulder-length
to tailbone-length) all my life. When I was a very young girl, my mother
used to wash my hair, divide it into four sections, and then braid each
section. By the time I was elementary school-age, I begged for her to blow-dry
my hair because I wanted it straighter. By late elementary, I wanted it even
straighter, so I begged my mother to press it with a hot comb. By high school,
that wasn't even straight enough, so I begged and pleaded for
a relaxer.
By age 25, I had had enough of scalp burns and running back to
the salon to "perm" my new growth, so I grew out my relaxer. But the
new obsession I would acquire would be nearly just as bad: I couldn't live
without my flat iron. So, from age 25 to 38, I kept my flat iron permanently
gassed up and ready to go at 480 degrees.
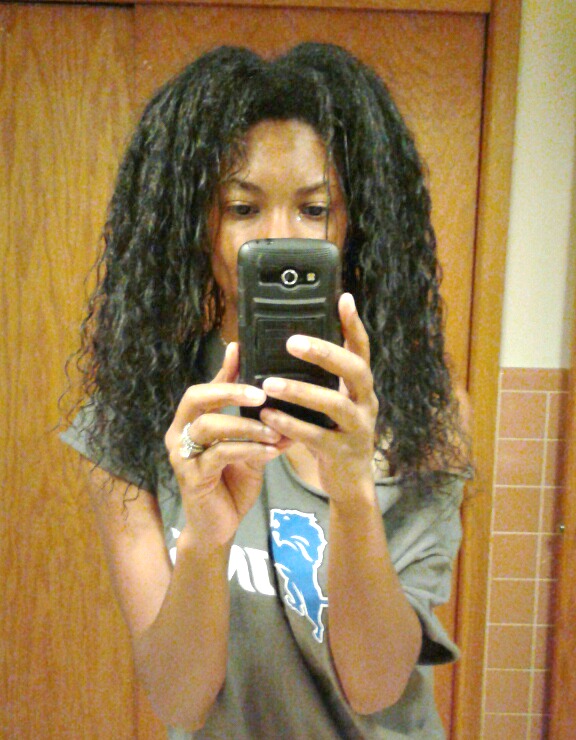
Just to give you a visual, here's how I wore my hair. Again,
this is 100% my real hair. No relaxer, just flat ironed to death:

The photo above was taken in March of 2015, and I would sooner
gouge my eye out with an ice pick than consider embracing my hair in its
natural state.
The irony, however, is that I prided myself in caring diligently
for my baby daughter Kennedy's curls, and I did everything I could to let her
know that her head of lush, voluminous, spiral strands was the most beautiful
thing I had ever seen. Here she is back in 2016 after bath time:

From
Straight to Curly
In the fall of 2015 when Kennedy turned two, something occurred
to me: Kennedy would soon call me a hypocrite...because if I thought her hair
was so gorgeous, Why in the hell was I doing everything I could to make
my hair the opposite of hers?
And so, in November of 2015, I decided that I would stop
flat-ironing/straightening my hair.
Period.
I vowed that the next time I washed my hair, I would simply slap
on some gel, let my curls air dry, wind up looking just like Kennedy (after
all, we have the same hair type and texture), and go about my merry way.
I would live happily ever after, I thought!
Except that the opposite happened.
When I washed it, it looked nothing like Kennedy's, and, instead, looked
mangy and lifeless:

I was mortified.
I didn't understand why and how this had happened.
Come to find out, all the excessive--and oppressive--heat I had
applied to my hair over the years in the form of blow dryers and flat irons,
had permanently damaged my hair.
I bolded, underlined, and italicized the two words above in an
effort to convey the seriousness of what was going on above.
Permanently. Damaged.
This means that no product, method, or cure could undo the harsh
beating my hair had endured as a result of the continuous heat I had subjected
it to.
Think about it this way: Remember those phones we used to have
on the kitchen wall back in the 70s and 80s? The ones with the long, spiral
phone cord?
What happens if you keep stretching that phone cord over and
over and over again? Over time, the cord's perfectly even spiral shape will
eventually become straight in some parts, and tangled in other parts.
Better yet, picture one of those plastic or metal Slinky toys
from our childhood. Remember how a Slinky would lose its shape and it would
never bounce the same?
Once that happens, there's nothing we can do to reinstate the
cord's or Slinky's original spiral shape.
That's exactly what happens to heat-damaged hair.
When you become a victim of heat damage, the only remedy is to
cut it off and patiently wait for new growth to arrive.
So that's exactly what I did.
The
Transition
I didn't "big chop”—that’s the natural hair term that
refers to cutting off all your hair at one time.
Instead, I transitioned. Over the course of 17 months, I trimmed
of an inch here and an inch there, wore a ton of hats, and acted as if I
already had the curls I had been waiting for.
Here's a quick video that demonstrates precisely what I went
through:
(If you can't see or click on the video box above, please click here.)
I'm not going to sit up here and feed you candy and tell you
lies: Transitioning from heat-damaged hair to the healthy, voluminous curls you
see in the photo at the top of this blog post was no fricking joke.
It. Was. Hard.
I cried.
I was frustrated.
It took nearly two years.
And, at times, I felt like quitting.
But, now, looking back, going natural was hands-down,
unequivocally one of the best decisions I had ever made.
My only regret is that I didn't do it sooner.
Here is a recent photo of Kennedy and me:

Somebody…anybody...HELP
ME!
Here's something that really bothered the hell out
of me during my transition, though:
I needed help. Real help. And no matter where I looked, I
couldn't find it.
I used to lay in bed at night with my laptop watching countless
wash 'n go tutorials on YouTube. I would then scurry off to Target, Sally
Beauty Supply, or the nearest beauty supply store and plunk down $25 here, $60,
$45 there...in hopes that my hair would turn out like the women in the videos.
Each time, no dice.
The only thing I succeeded at was basically going broke and
growing more despondent.
It wasn't until about one year into my hair journey that I
finally figured out what the hell to do.
And when I did, I vowed right then and there that I would
someday help as many curly girls as I could.
My Best
Advice for The Best Curls.
So, here's the point in this blog post where things get good
because here are the curl commandments I've come to live by.
Do you want healthy curls?
Do you really, REALLY want them?
Then here's what you do:
1. STOP STRAIGHTENING YOUR HAIR.
Yup, you read correctly. No. More. Flat irons. Look at it
this way: Every single time you flat iron your hair and subject it to 400+
degrees of direct heat, you run the risk of incurring heat damage. The more you
flat iron, the greater your chances. Oh, come on, Courtney, I'm only
going to do it once a month. That won't hurt...right? I wouldn't
chance it. All it takes is once. One. Time. And this can happen:

The photo above is just one example I found on Instagram. But,
trust me, there are others that are even worse than this. It begs repeating:
There is nothing this woman can do to restore the heat-damaged portion.
Nothing. Just trust me on this one. Each and every time you take a flat iron to
your hair it's like playing Russian roulette.
2. WATER = LIFE FOR CURLS. IT'S THAT SIMPLE.
There is absolutely no way in hell you can achieve bouncy,
healthy, lush, clumping curls without water. Water is essential. Again, let me
stress: When it comes to curls, moisture is not optional, nor is its importance
debatable. Nine times out of ten, when curly girls are experiencing problems
with the condition of their hair, it's often because their curls are lacking
moisture. Now, this is an entirely new way of thinking for those of us who have
spent our life straightening our hair. If you spent tons of time and money to
get your perfect blow-out, then you've also likely been trained to run from
rain clouds, stay inside on a humid day, and wear a shower cap in the shower.
Translation: If you want your hair to remain straight, you learn to avoid
water. But it's the complete opposite for curly hair: Without water, without
that essential moisture, your curls will frizz, and basically look lifeless,
and worse yet, your hair may even break off. Look no further than immediately after
you've washed your hair for the perfect example of this: Think about it, your
curly hair probably looks its best while it's sopping, soaking wet, straight
out of the shower...right? This is because your curls are in their glory,
soaking in all that wetness! It's not until your curls dry that you might
experience issues, which leads me to commandment No. 3...
3. SAY NO TO OILS, SILICONES, AND BASICALLY ANYTHING THAT COATS
CURLS.
Now, allow me to state for the record that there are curly girls
who use products with coconut oils, shea butter, or other oils, and they claim
their curls are just fine. And if you are one of those curly girls, more power
to you. But you should also know that if you are a curly girl who is less than
pleased with your curls, just know that silicones and oils may be the reason.
This is a tough pill for many curly girls to follow, particularly
African-American curly girls because we have been culturally conditioned to
believe our hair needs "grease" and oils. It's just what we've always
been told. We've been programmed to think about hair in terms of race instead
of science. Somewhere along the way, we've been taught to believe that those
oils and butters provide moisture for our hair. But if we stopped to think
about it...could that really be possible? No. Picture this: If I wrapped my arm
in clear Saran wrap and then dunked it into a tub of water, is my arm really
getting wet? Nope. It looks like it's getting wet, but the
Saran wrap is acting as a barrier. This is essentially what happens when your
hair is suffocating under four layers of coconut oil or shea butter. This is
why curls are dry: Water can't get past the butters and/or oils.
4. LOTS OF WATER + LOTS OF CONDITIONER = MAGIC
This commandment is the combination of 2 and 3 above. When lots
of water and lots of conditioner are applied to the hair simultaneously,
oooohh, la, la. Bliss! People often think that conditioner is the product that
conditions the hair, and while that statement isn't false, it doesn't present
the entire story. Think of it this way: Conditioner is actually the vehicle
that allows water to penetrate your hair. It's almost as if conditioner is the
car that delivers water to its destination, aka the center of each hair shaft.
The only potential roadblock is if the conditioner contains something called
silicones. A silicone is an artificial ingredient used in many conditioners for
the purpose of making hair appear shinier and healthier than it is. The problem
with this is that, like, oils and butters, the vast majority of silicones coat
the hair and prevent water from getting in. In fact, silicones (like oils and
butters) have a tendency to build-up on the hair over time, and that can really
spell disaster. So here's the point: Look for silicone-free conditioners.
And how do you identify a silicone in a list of ingredients? Look for any
ingredient ending in "-cone." The higher up the silicone is in the
list of ingredients, the heavier the concentration of that particular
ingredient. And here's the real kicker: Silicone-free conditioners do NOT have
to be expensive! I ONLY use silicone-free conditioners on my and Kennedy's
hair. I rotate between three of them, in fact. And guess what? All three of
them cost under $5 a bottle. My current favorite is Vo5's Strawberry Moisture
Mils Conditioner ($.97 at Walmart, baby!) and Trader Joe's Tea Tree Tingle
Conditioner, which is $3.99 at Trader Joe's (a word to the wise: DON'T buy this
on Amazon.com because you will find that it'll cost 4 x as much!).
Also, I think it is only appropriate for me to take a moment to
answer the #1 question I get almost daily: What products do you use on
your hair?!?
The following video below will show you, but most importantly, I
explain why I use what I use. When that is understood, then
you will more easily be able to find the products that work best for you:
(If you can't see or click on the video box above, please click here.)
But, before you run off to the store to grab everything I
mention in the video above, please, please, PLEASE do the following first: YOU
NEED TO CLARIFY YOUR HAIR!
What is that, you may ask?
Clarifying is another term for deep cleansing; it's like wiping
the slate clean and pressing the reset button on your hair.
Here's the thing: Before you can begin using the regimen I
describe above, FIRST it is imperative that you get all the layers of
"gunk" and build-up which may already be on your hair.
Because if you've used oils and/or products containing heavy
butters or silicones (Please re-read the section above about my arm and Saran
wrap), then my method is not going to work due to the layers of build-up
covering your strands.
So, here's how I recommend clarifying: Go pick up a bottle of
shampoo with ingredients that contains sulfates. (Sulfates are the ingredients
that cause soaps and shampoos to make lather--and you can spot them in the list
of ingredients because you will literally see the word sulfate listed.)
Normally, I don't use shampoos with sulfates because sulfates
are extremely harsh ingredients that, if used regularly, can strip and dry out
hair--especially curly hair--over time. (Again, you'll notice that the shampoo
I mention in the video above (Trader Joe's Tea Tree Tingle Shampoo) is
sulfate-free).
However.
I do clarify my hair three times a year with a sulfate shampoo
to perform a really deep cleaning on my hair and keep build-up at bay.
The sulfate shampoo I recommend is Suave's Naturals Daily
Clarifying Shampoo. It's cheap (under two bucks), found at nearly every drug
and grocery store, and it does the trick.
Okay.
I know all of the above is a lot to digest.
In an effort to not make this blog post any longer than it
already is, I'm going to leave it here.
But, just trust me on all of this.
It has worked for my daughter and me, and it will work for you.
For more details on things like the complete list of products I use, how I preserve my curls while I sleep, and other tips, please visit my YouTube channel here, and click on the VIDEOS link at the top.
I hope you found this helpful!

No comments:
Post a Comment